
Anyone can learn to do technology “hacking”, and this post will walk you through an open source example that you can implement on your own.
When you think of the term “hacker”, what image does it evoke? Do you think of a highly skilled and determined computer security adversary hiding in his (or her) basement, attempting to penetrate your defenses and steal your data? In 2020 the term conveys a more sinister tone of malicious intent. Now there are a range of categories for the term, including “Black Hats”, “White Hats”, and “Grey Hats.” They are distinguished by intent and permission. That wasn’t always the case though. Hacking used to signal all good things. Interestingly enough, the origin of the term is in 1961 at MIT’s Model Railroad Club. The members hacked their train sets in order to modify their functions. By this, we can extend the meaning to say hacking is understanding how things work under the hood. It is tweaking technology to use it in new and creative ways. I like to throwback to the original intent of this word. Hacking is the purest and most noble form. In the spirit of this guide below, you can enjoy a tutorial on technology hacking. At the very least, it can be fun to explore into an application that can mirror a flawed security approach found in production systems. Feel free to clone this repo and expand upon it with your own ideas.
I recently stumbled across a fascinating web application with some security flaws. Every once in a while you find something that gets you so excited to learn something new. I had to go back and break apart what I saw and re-create it for my own understanding. Now I am not a professional software engineer. But I do absolutely love to learn and understand things. This is a great example of how developers can introduce risk by code or deployed environment. The spirit of this project is to share a learning application for all. Introducing Hammer — a vulnerable example of a web application written in Ruby on Rails. In this post, I’ll walk you through creating Hammer. Are you ready? Let’s get on it. But first, an overview of what Hammer actually is:

- A vulnerable web application written in Ruby on Rails.
- 100% FOSS InfoSec community contribution which can be downloaded here.
- Simulates production web application deployment with MySQL database backend using Rails scaffolding technique.
- Docker-compose automated deployment or manual build instructions. The Docker container uses MariaDB database backend.
- Bootstrap Admin Dashboard for nice looking UI.
- Contains python scripts to deploy simulated production user data with credit cards and user credentials.
- Contains a misconfigured Ruby on Rails gem.
- Hidden easter egg contained in the application.
- Configuration steps for production configuration, including Let’s Encrypt TLS certificate
- Demo Hammer application at https://preprod.rtcfingroup.com (Please be nice on my app)
For an automated Docker Compose deployment, skip down to the “Docker Deployment” section. Otherwise, you can follow these “Manual Build Steps” specified just below. Note that this was built and tested on Ubuntu Linux 18.04.
Manual Build Steps (Ubuntu Linux 18.04)
Step 1: Install MySQL. These steps were verified on Ubuntu Linux 18.04.
Below is a guide showing my script selections when creating this application. Feel free to select as you best see fit to match your own security requirements. Since this is a deliberately insecure application, careful thought should be given for other deployment types requiring better security:
$sudo apt update $sudo apt install mysql-server mysql-client libmysqlclient-dev -yRun the mysql_secure_installation script.$sudo mysql_secure_installationBelow is a guide showing my script selections when creating this application. Feel free to select as you best see fit to match your own security requirements. Since this is a deliberately insecure application, careful thought should be given for other deployment types requiring better security:
- Validate password plugin? No
- New Password? <ENTER PASSWORD>
- Remove anonymous users? Yes
- Disallow root login remotely? Yes
- Remote test database? Yes
- Reload privilege tables? Yes
Step 2: Install Ruby Version Manager
$sudo apt-get install software-properties-common -y
$sudo apt-add-repository -y ppa:rael-gc/rvm
$sudo apt-get update
$sudo apt-get install rvm -y
Create a new user and add them to the rvm group.
$useradd -m -s /bin/bash -G rvm <username>
Delegate permissions via /etc/sudoers. Edit line in /etc/sudoers to add permissions for that user. For ease of this change, you can simply mirror the same permissions as the root user.
# User privilege specification
root ALL=(ALL:ALL) ALL
<username> ALL=(ALL:ALL) ALL
Change the user’s password
sudo passwd <username>
Log in as that user and perform remaining steps while logged in as that user.
Step 3: Install Ruby 2.6.3 using rvm (while logged in as new user)
$rvm install 2.6.3
Step 4: Clone hammer repo and run “bundle install”
$git clone https://github.com/iknowjason/hammer
$cd hammer
$bundle install
Step 5: Edit the database configuration file in config/database.yml.
Change the password in the password field for <DB_PASSWORD> to match what you specified for the root password in step 1.
Run mysql client to connect to MySQL and alter permissions. Specify the same password below in <PASSWORD> that you entered above and in step 1.
$sudo mysqlmysql>
ALTER USER ‘root’@’localhost’ IDENTIFIED WITH mysql_native_password BY ‘<PASSWORD>’;
mysql> exit
Verify that you can now authenticate as root. At the prompt enter your root password:
$mysql -u root -p
mysql> exit
Step 6: Populate MySQL DB with rails application data.
$cd /home/<username>/hammer
$rake db:create
$rake db:migrate
Step 7: Install latest NodeJS.
$curl -sL https://deb.nodesource.com/setup_10.x -o
nodesource_setup.sh
$sudo bash nodesource_setup.sh
$sudo apt install nodejs -y
Step 8: Install the latest yarn and then rebuild the pages for this application instance.
Install latest yarn:
$curl -sS https://dl.yarnpkg.com/debian/pubkey.gpg | sudo apt-key add -
$echo 'deb https://dl.yarnpkg.com/debian/ stable main' | sudo tee /etc/apt/sources.list.d/yarn.list
$sudo apt update && sudo apt install yarn -y
Run rake commands to compile pages:
$bundle exec rake assets:precompile
$bundle exec rake webpacker:compile
Step 9: Start the app on default port 3000
$rails s -b 0.0.0.0
Verify that it is working by checking the default page with a browser — URL of http://<IP>:3000.
Verify that pages are served without any errors. (Tables will show no data)
http://<IP>:3000/users
http://<IP>:3000/creditcards
You should see this on the default page:

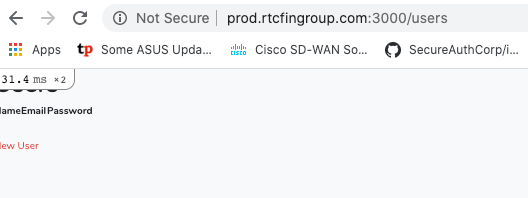
You should see this on the users page:
Step 10: Add simulated user and sensitive credit card data with supplied Python scripts. First, break the application by inputting <CTRL-C>.
Install python modules:
$sudo apt-get install python3-pip -y
$sudo python3 -m pip install Faker
$sudo pip3 install pymysql
In the working directory of the application, change into the python_scripts directory.
$cd /home/<username>/hammer/python_scripts
Edit the gen_users.py and gen_creditdata.py scripts. Change the following variables to match your MySQL DB instance specified in Step 5:
DB_USERNAME
DB_PASSWORD
DB_NAME
Note: If you used the default values in config/database.yml, the DB_NAME should be rackvuln_development.

Run both scripts:
$./gen_users.py
$./gen_creditdata.py
Change back into the working directory of the rails application. Launch the app again.
$cd /home/<username>/hammer
$rails s -b 0.0.0.0
Verify with your browser that you can access the /users and /creditcards URLs and this time they render some data!
http://<IP>:3000/users
http://<IP>:3000/creditcards

Step 11: Stop and Consider: At this point, you have a working demo application. For a more production feel, you can of serve up the application with a root CA issued TLS certificate hosted on your domain with an Nginx reverse proxy. Only proceed forward if you have a domain and DNS record resolving to your site. For this, you can easily create a new host with a cloud Linux VPS provider such as Digital Ocean or Linode.
Step 12: Install Nginx for Reverse Proxy and TLS tunnel termination.
$sudo apt install nginx -y
Step 13: Install Lets Encrypt Certbot
$sudo add-apt-repository universe
$sudo add-apt-repository ppa:certbot/certbot
$sudo apt-get update
$sudo apt-get install certbot python-certbot-nginx -y
Step 14: Run certbot to create TLS certificates
$sudo certbot --nginx
Answer the questions:
Your email address: <ENTER>
Agree to terms of service:
Willing to share your email:
Enter domain name: <HOST.DOMAIN.COM>
Note: This step above is important. Ensure that certbot is able to automatically deploy the TLS certificate.
Re-direct: (I always select ‘2’ for enabling re-direct)
Step 15: Re-start and verify nginx
$sudo service nginx restart
$sudo service nginx status
Step 16: Edit the nginx configuration to configure an Nginx reverse proxy. This will configure Nginx to forward TLS terminated traffic to the Rails Puma app server running on localhost. The configuration below should be matched to meet your specific environment.
Edit /etc/nginx/sites-available/default
Replace the server_name and root directives to match your FQDN and the directory for your rails application. Replace the host and return 301 parameters to match your FQDN. This example below can serve as a template but needs to be modified to match your environment.
upstream app {
    server 127.0.0.1:3000;
}

server {
    server_name prod.rtcfingroup.com;
    root /home/rails/hammer/public;
    try_files $uri @app;

    location @app {
        proxy_pass http://app;
        proxy_set_header X-Forwarded-For $proxy_add_x_forwarded_for;
        proxy_set_header Host $http_host;
        proxy_redirect off;
    }
    error_page 500 502 503 504 /500.html;
    client_max_body_size 4G;
    keepalive_timeout 10;

    listen 443 ssl;

    if ($scheme != "https") {
        return 301 https://$host$request_uri;
    }

    ssl_certificate <PATH>
    ssl_certificate_key <PATH>
    include <PATH>
    ssl_dhparam <PATH>
}

server {
    if ($host = prod.rtcfingroup.com) {
        return 301 https://$host$request_uri;
    }
    listen 80;
    server_name prod.rtcfingroup.com
    return 404;
}
Step 17: Save the file, re-start nginx service, and verify that it is running
$sudo service nginx restart
$sudo service nginx status
Step 18: Start the rails app to listen on localhost, port 3000.
$cd /home/<username>/hammer
$rails s
Step 19: Verify everything is working by browsing to your new FQDN (i.e., https://host.domain.com). Nginx should terminate the TLS connection and re-direct to the Rails Puma app server listening on port 3000!

Docker Deployment Steps
Step 1: Get docker-compose
$sudo apt-get update
$sudo apt-get install docker-compose -y
Step 2: Get the repo using git
$git clone https://github.com/iknowjason/hammer.git
Step 3: Run docker-compose commands to build and bring up the container
$cd hammer
$sudo docker-compose build
$sudo docker-compose up
Step 4: If a database error results on the first try, run docker-compose up again.
$sudo docker-compose up
Step 5: Use a browser to navigate to port 3000 on your host.
http://<IP>:3000
I hope you enjoyed building this vulnerable demo application. There are many valuable lessons learned in this vulnerable application that you can hack away at. I welcome any comments, suggestions, and collaboration. If you have ideas to improve it or are a Rails developer with ideas, please reach out to me. There will be more to come in the future on lessons learned.